Setting the color of the solder mask
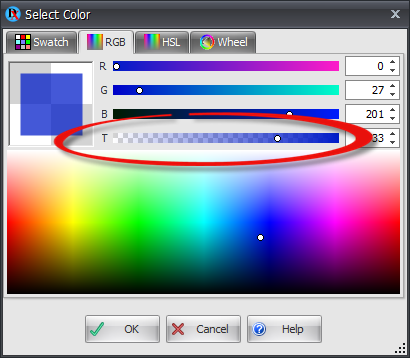
To set the color of the solder mask click on the  button. The color selector dialog will appear. Make sure to make it semi-transparent so you can see through it when it is displayed. You can make it semi-transparent by dragging the T slider shown below.
Solder mask color
Removing a pad's cutout
Normally a pad generates its own solder mask cutout. However you may want to define a custom no solder mask area and do not want the pad to automatically create a no solder mask region. You do this by selecting the pad and unchecking the Add Solder Cutouts check-box in the pads properties panel.
Adding a custom solder-mask cutout
You can add a custom solder mask cutout to the top or bottom side of the PCB. To add one you must have either the top copper layer or the bottom copper layer selected. You can do this using the layers panel.
A custom solder mask cutout can be rectangular (with optional rounded corners) or circular/elliptical or polygonal/curved.
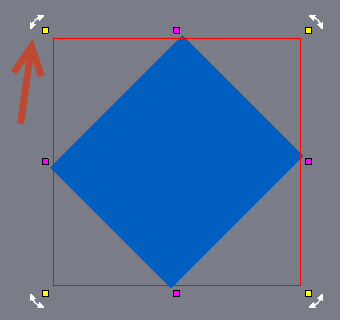
Rotating a solder-mask cutout
1.To rotate a cutout select the cutout by clicking on one of its edges.
2.Drag one of the corner manipulators to rotate it. See rotation snap and rotating objects for more.
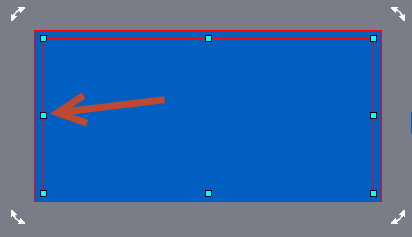
Scaling a solder-mask cutout
1.To cutout a cutout select the cutout by clicking on one of its edges.
2.Drag one of the edge manipulators to scale it. See scaling objects for more.
Moving a solder-mask cutout
To move a solder-mask cutout, hold down the left mouse key over the cutouts edge and drag it.
Deleting a solder-mask cutout
Select the cutout and press the DEL key.