You can add open and closed curves.
To set the Fill Styles and Line Styles before adding curves use the Default Graphics Settings.

An Open Curve

A Closed Curve
To add an open curve to a graphical sheet, click on the  button in the Add→Shapes ribbon menu button group.
Curves in AutoTRAX DEX are piecewise bezier curves.
A Bezier curve is a mathematical curve used in computer graphics and related fields to model smooth curves. It is defined by a set of control points, which influence the shape of the curve.
A piecewise Bezier curve is a Bezier curve that is made up of several Bezier curve segments, each defined by its own set of control points. These segments are joined together end-to-end to form a smooth curve.
The advantage of using a piecewise Bezier curve is that it allows for greater flexibility in modeling curves with varying degrees of curvature. By using multiple segments, each with their own control points, it is possible to create a curve that has both sharp corners and smooth curves.
To create a piecewise Bezier curve, one simply needs to define the control points for each segment and then join them together. The resulting curve will be a smooth, continuous curve that can be used for a wide range of applications in computer graphics and related fields.
To add a closed curve to a graphical sheet, click on one of the  buttons in the Add→Shapes ribbon menu button group.
 Adds a hollow curve.
 Adds a filled curve with border.
 Adds a filled curve without a border.
Move the mouse inside the graphical sheet's viewport. You will see the point cross follow the mouse. Left-click when the point cross is where you want to start a curve or press the Enter key followed by the X value, Enter/Space/Tab key, the Y value, and then Enter/Space/Tab to exactly place the starting point.

Move to the start of the curve
Now as you mouse the mouse the first segment of the curve will be defined.

Move to end of first segment
Left-click to define the second point for the curve or press the Enter key followed by the X value, Enter key, the Y value, and then Enter to exactly place the second point. Now as you move the mouse the curves second segment is being defined.
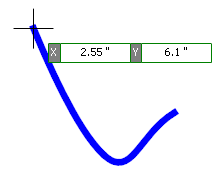
Open Curve
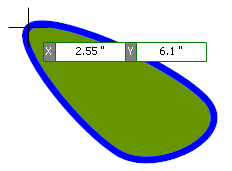
Closed Curve
Continue this to complete the curve. If you are adding an open curve and you place the cursor over the first point of the curve and left-click, the curve will be automatically closed and filled.
Double-click to end the curve with the next segment to be placed or press the ESC key to end the curve with the last completed curve segment.