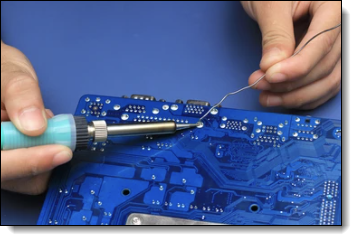
Hand Soldering
Soldering a Printed Circuit Board (PCB) by hand is a valuable skill for electronics hobbyists, and while it's not overly complicated, it does require some care and attention to detail to do it correctly. Here is a basic step-by-step guide:
Materials:
Soldering Iron - A tool with a heated metal tip used to melt solder.
Solder - A fusible metal alloy used to create a permanent bond between metal workpieces.
Soldering Stand - To hold the soldering iron when not in use.
Soldering Sponge - To clean the soldering iron tip.
PCB - The board onto which components will be soldered.
Electronic Components - The parts to be soldered onto the PCB.
Desoldering Pump or Wick - For correcting mistakes.
Safety Glasses - Protects your eyes from any splashes of solder or cut component leads.
Tweezers - To hold tiny components.
Wire Cutters - To trim the leads of components after soldering.
Steps:
Prepare Your Workspace: Make sure your work area is well-ventilated and free of flammable materials. Place your soldering iron in its stand and plug it in. Ensure the tip is clean and tinned (coated with a thin layer of solder).
Insert the Components: Push the leads of your components through the appropriate holes in the PCB. Resistors, diodes, and some capacitors are not polarized, meaning they can be inserted either way. Other components, like electrolytic capacitors and ICs, are polarized and must be inserted with the correct orientation.
Secure the Components: Bend the leads on the other side of the PCB to keep the components in place. Make sure the components sit flat against the PCB.
Apply Heat: Touch the soldering iron tip to the component lead and the copper pad at the same time. Wait a second or two for them to heat up.
Apply Solder: Touch the end of your solder to the joint (but not directly to the iron tip). The solder should melt and flow freely around the lead and onto the pad. Remove the solder, then remove the iron. Allow the joint to cool naturally, without blowing on it.
Inspect the Joint: A good solder joint will look shiny and have a concave shape. A bad joint could look like a ball of solder, be dull or grainy, or not fully cover the pad.
Trim the Leads: Once the joint is cool and you've inspected it, use your wire cutters to trim off the excess lead close to the solder joint.
Repeat: Repeat these steps for all of your components.
Clean the PCB: After you've soldered all your components and the board is cool, you can clean off any flux residue with isopropyl alcohol and a brush.
Check Your Work: Use a multimeter to check for shorts and correct component values.
Safety Tips:
Always wear safety glasses when soldering.
Never touch the tip of the soldering iron.
Wash your hands after soldering to remove any lead residue.
Don't inhale the smoke that's produced when soldering. Use a fume extractor if possible.
Turn off and unplug the soldering iron when you're finished with it.
Remember that practice makes perfect. Soldering can be tricky to get right the first time, but with patience and experience, you'll get better at it.